Tuesday, August 28, 2012

Core Lies

This summer I started a Bible/book study at church.  Unfortunately, I couldn't keep attending the classes due to school and an Awana commitment, but I did continue reading one of the books that we were studying.  It was so eye opening.  And messy.  And hard to handle at times.  It revealed things about myself that were ugly.  But now I'm on a track to a healthy relationship with me.


The e-book is called "Core Lies" by Sarah Mae.  It's only 36 pages and it's completely free to download.  I just downloaded it on my iBooks for iPad.  I would highly suggest each and every one of you to download and read it as well.  It's about exposing lies that we believe to be true about ourselves.  For example, not being pretty enough, not being smart enough, not being good enough, etc... And then it goes further to make you uncover wounds in your life that caused these lies.

When I first started reading it, I didn't think any of them applied to me.  But then the author started giving examples.  Oh.my.word.  I was doing or thinking almost all of those things.  It took me awhile to realize the grip that these lies had over my life.  But once I was able to uncover them, suddenly I was aware of my actions and behavior.  There were times when I really didn't like the way I was acting, but more so, I didn't like the lie I was believing about myself.

I believe women are especially hard on themselves.  We compare ourselves to these super models that adorn the front of magazines who are unrealistic and frankly, freaks of nature.  I mean, what normal woman is 5'11', 100 lbs, 36", 24", 36"?!  We compare ourselves to other women we know, wishing we had qualities and attributes they encompass.  "I wish I could cook like her, I wish my hair looked like hers, I wish I could sew like her, I wish I had her eyes, I wish I was that skinny, I wish my body looked like that."  We even relish in someone else's pain and weakness because it makes us feel better about ourselves.  How awful.  It seems we always want what we don't have.

We have to stop doing this.  
It's destructive and degrading to all of us.

Why do we act this way?  We are all each fearfully and wonderfully made in the image of our Creator.  We all have our own unique talents and we're supposed to use them to glorify the One who made us.  Besides, if I'm always complaining about the way I look or feel, what am I really saying?  I was made in His image.  Is He not good enough?  Surely not!  So what makes me think I should be any better than He made me?

I'm sure this is all just rambling, but I need to be reminded of this occasionally.  This study was very eye opening for me.  It helped reveal lies that I believed about myself and see the destruction they have in my life.  That's the devil's way of having a grip over me.  But I won't give in!  I hope you'll take the time and read this quick book.  The book is a fast read, but the lesson is never ending.


Monday, August 27, 2012

Back to School

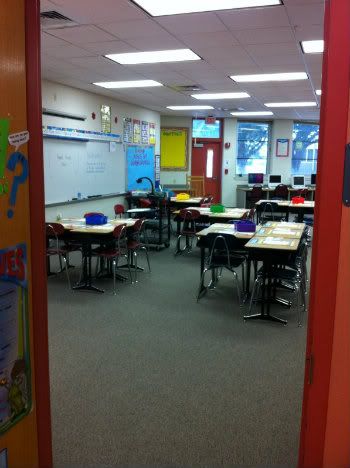
School is officially back in full swing.  I moved classrooms this year and I'm loving my new room.  It is so much bigger than last year's and I feel more included.  Since I didn't take any before and after pictures last year (I was in survival mode), I wanted to make sure I did that this year.  So, this will be a post FULL of pictures.

Before Pictures
(Many of these were taken after I had cleaned out most of the stuff.)


And After Pictures...

ViewfromDoor2
view from the front door

 view from the back of the room facing the board 

 view from the kids' cubbies

view of the back of the room

 view of my little area (I also have an office)

 view from the back door

computer/A.R. area

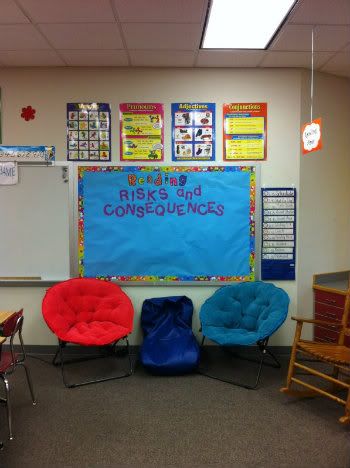
ReadingBoard2
reading board/reading area

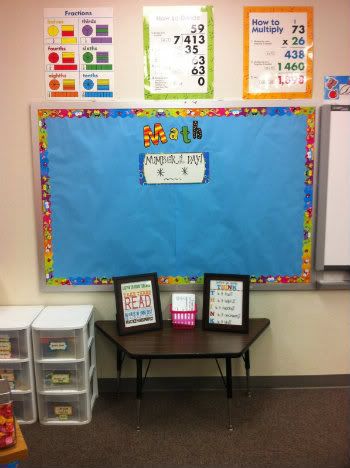
MathBoard2
math board

student center

orientation letter and treat

I'm really happy with how it all turned out.  It was A LOT of work.  I don't think people realize just how hard teachers work.  But it's SO worth it.  I was going with a polka dot theme, but you see how well that worked out, right?  So, I just decided to use bright colors because they make me happy.  Since I teach older kids, I can get away without doing a set theme.  Plus, I didn't have the money to replace everything for polka dots.  I think I'll survive. :)
 
 Me on the 1st Day of School

I'm so excited to get the school year going.  We had a very successful first week of school.  I'm lovin' my new class!  Unfortunately, we're out today due to Hurricane Isaac.  Hopefully we'll be back by the end of this week.  Time's a-tickin' and we have lots of learning to do.  I'm praying for all of you other teachers, administrators, and students that you'll have a wonderful year! XO


Thursday, August 9, 2012

DIY Monogram Coasters

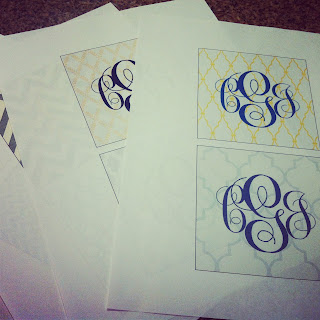
I've got another Pinterest project under my belt.  I came across this pin on how to do your own monogrammed coasters.  We needed coasters so I figured why not give it a shot.  It's a little bit more detailed than I first thought and it took me awhile to hunt down some good backgrounds and format everything, but I'll gladly share the backgrounds I did find in case anyone wants to do this.

The materials needed are: 4x4 white tiles (found mine at Home Depot in the bathroom tile section), modpodge, sponge brush, felt pads for the back of coaster, scissors, clear coat acrylic sealer, and a computer/printer.  These are the steps:

1.  I started by creating a text box in Microsoft Word. I made my dimensions 4x4 since I was using a 4x4 tile.

2.  I downloaded the font, monogram kk, and used it to make our initials inside the text box.  You have to play around with the spacing and size elements to get your monogram to look right.  You'll want to right click each letter, select "font", click "character spacing" and play around with the scale, spacing and position.


3. Once you have your monogram made, google different background images, right click and save them on your computer.

4.  Go back to your Word document and click in the text box, just to put the cursor back in the text box.  Go to format, shape fill, and then select picture.  Insert whichever picture you like, play around with the font colors & print it out.


5.  Cut out all of your square monogram pictures.


6.  Put one coat of modpodge on a tile, then lay your monogram picture on top.  Be sure to smooth the edges so you don't have any bubbles.  Allow this to dry for 1 hour...and REALLY wait that hour.  I tried to do it quickly on one and it smeared the ink because it was still too wet...not the look I was going for.


7.  After an hour has passed, put 2 coats of modpodge on top of each monogram picture, allowing 15 mins between the coats.

8.  When it's all dry (I waited until the next day), apply 1-2 coats of the acrylic sealer and let dry again.


9.  Lastly, stick on 4 of those little felt pads on the back of each coaster.  You wouldn't want to scratch up your table!


And you're all done!  This was a fun, cheap project and it's personalized just for me.  Total cost:
  $1.28 for tiles ($.16 each x 8 tiles)
+$3.00 for felt pads
+$5.00 for clear acrylic spray
$9.28 for monogrammed coasters

**I already had modpodge and sponge brush

So, I did this for less than $10.  I priced these on Etsy and they range from $15 to $30 for a set of 4 plus shipping.  So that means I did my project for a quarter of the cost, or less depending on which buyer I went with.  My hubs can appreciate me saving the mulah. ;)


Hope y'all have a wonderful weekend! XO