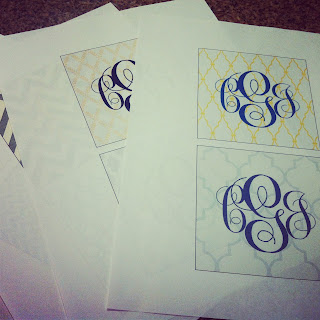
The materials needed are: 4x4 white tiles (found mine at Home Depot in the bathroom tile section), modpodge, sponge brush, felt pads for the back of coaster, scissors, clear coat acrylic sealer, and a computer/printer. These are the steps:
1. I started by creating a text box in Microsoft Word. I made my dimensions 4x4 since I was using a 4x4 tile.
2. I downloaded the font, monogram kk, and used it to make our initials inside the text box. You have to play around with the spacing and size elements to get your monogram to look right. You'll want to right click each letter, select "font", click "character spacing" and play around with the scale, spacing and position.
3. Once you have your monogram made, google different background images, right click and save them on your computer.
4. Go back to your Word document and click in the text box, just to put the cursor back in the text box. Go to format, shape fill, and then select picture. Insert whichever picture you like, play around with the font colors & print it out.
5. Cut out all of your square monogram pictures.
6. Put one coat of modpodge on a tile, then lay your monogram picture on top. Be sure to smooth the edges so you don't have any bubbles. Allow this to dry for 1 hour...and REALLY wait that hour. I tried to do it quickly on one and it smeared the ink because it was still too wet...not the look I was going for.
7. After an hour has passed, put 2 coats of modpodge on top of each monogram picture, allowing 15 mins between the coats.
8. When it's all dry (I waited until the next day), apply 1-2 coats of the acrylic sealer and let dry again.
9. Lastly, stick on 4 of those little felt pads on the back of each coaster. You wouldn't want to scratch up your table!
And you're all done! This was a fun, cheap project and it's personalized just for me. Total cost:
$1.28 for tiles ($.16 each x 8 tiles)
+$3.00 for felt pads
+$5.00 for clear acrylic spray
$9.28 for monogrammed coasters
**I already had modpodge and sponge brush
So, I did this for less than $10. I priced these on Etsy and they range from $15 to $30 for a set of 4 plus shipping. So that means I did my project for a quarter of the cost, or less depending on which buyer I went with. My hubs can appreciate me saving the mulah. ;)
Hope y'all have a wonderful weekend! XO


12 comments:
Cute!!
Thank ya, ma'am!!
LOVE THESE!!! What a great idea to print the design off the computer. I used stickers & it worked ok but
had a little bubble. I will def be trying this =)
Wow, those look amazing! You are a great blogger which is why I nominated you for an award :) go to hht://thesimmondsinthesuburbs.blogspot.com and check it out. Hope you have a great beginning of the school year, Cat!
Found your blog today and think it is adorable! Following now!
Love these coasters! I'm definitely going to try to make a set.
Life with Elizabeth
Can you tell me which patterns you used? Thanks
Super!!!
thanks for the instructions! did you use a laser jet printer? also did you print them on cardstock or normal thinner paper?
I did not use a laser jet printer - just my regular old home office printer! And I printed them on standard paper. Nothing fancy! :)
I'm having trouble finding backgrounds. What did you search?
I just googled trellis, chevron, and decorative backgrounds. Hope that helps you out!
i am having trouble getting my monogram centered. I have tried everything i can think of!!! It looks good in word and on print preview, but when i print it it is closer to the bottom and not centered. any advice??
Post a Comment